Word to HTML Converter — Complete User Tutorial
Learn how to transform rich text content into clean, standards-compliant HTML code using every feature of this powerful online editor.
Understanding the Word to HTML Converter Tool
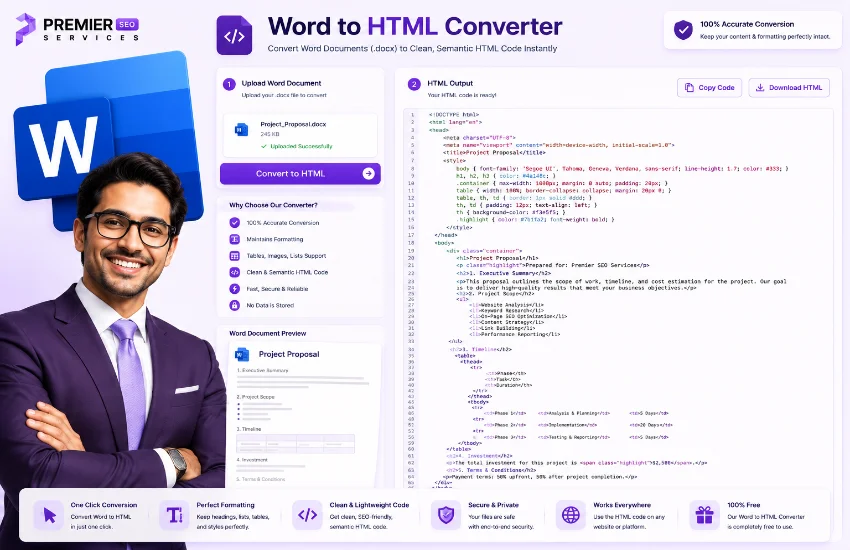
This word file to html converter provides a dual-panel interface where the left side contains a fully functional rich text editor and the right side displays the generated HTML code in real time. The top toolbar holds all formatting controls arranged into logical groups — text styling, heading levels, list creation, link insertion, and alignment options. The Convert button sits on the far right alongside the Clear button, giving you quick access to the two most common actions.
The tool works on a simple principle: whatever you type or format in the editor gets converted into clean HTML automatically. The conversion strips inline styles and class attributes, producing lightweight and semantic code that works across all platforms. Whether you are drafting a blog post, preparing content for a CMS, or building email templates, this convert word to html workflow saves hours of manual coding.
Getting Familiar with the Rich Text Editor in This Word HTML Converter
The Rich Text Editor panel on the left is a contenteditable area where all your writing happens. It behaves like a simplified word processor inside the browser. Click anywhere inside the editor to start typing. The placeholder text shows "Start typing here..." until you enter your first character. The editor supports standard keyboard shortcuts for common actions — Ctrl+B for bold, Ctrl+I for italic, Ctrl+U for underline, and so on.
As you type, the footer of the editor panel updates two live counters. The word counter shows the total number of words in your document. The character counter shows the total number of characters including spaces. These counters update instantly with every keystroke, giving you real-time feedback on your content length. This word html converter makes it easy to keep track of your document statistics while you work.
How to Convert Word to HTML Using Text Formatting Controls
The first group of formatting buttons handles text emphasis. The B button wraps selected text in a strong tag for bold formatting. The I button applies an em tag for italic styling. The U button adds an underline using the u tag. The S button strikes through text using the s tag for content you want to mark as removed or outdated.
To use any of these, select the text you want to format inside the editor and click the corresponding button. The formatting applies instantly and the HTML output panel updates to reflect the change. You can combine multiple styles on the same text — bold italic text, for example. Each online word file to html converter session gives you complete control over text appearance without touching a single line of code.
Structuring Content with Headings and Paragraphs for Clean HTML
The second group of buttons manages document structure. H1 creates a top-level heading wrapped in an h1 tag. H2 and H3 create second-level and third-level headings respectively. The P button resets the formatting back to a standard paragraph using the p tag. These heading levels help you build a clear content hierarchy that search engines and screen readers can interpret correctly.
Headings should follow a logical order — start with H1 for the main title, use H2 for major sections, and H3 for subsections underneath. The best word file to html converter workflow encourages proper document structure by giving you direct access to these semantic HTML elements. Simply place your cursor where you want the heading, click the appropriate button, and start typing. The generated HTML preserves this hierarchy in the output.
| Button | HTML Tag | Best Used For |
|---|---|---|
| H1 | <h1> | Page title or main heading |
| H2 | <h2> | Major section headings |
| H3 | <h3> | Subsection headings |
| P | <p> | Standard paragraph text |
Creating Lists and Links Using an Online Word to HTML Converter
The third group of buttons handles list creation and hyperlinks. The bullet list button inserts an unordered list using the ul and li tags. The numbered list button creates an ordered list using the ol and li tags. The link button opens a prompt window where you enter a URL, then wraps the selected text in an anchor tag with the href attribute.
Lists are essential for presenting related items in a scannable format. Bulleted lists work well for features, benefits, or any group where order does not matter. Numbered lists suit step-by-step instructions, ranked items, or sequences. When inserting a link, make sure to select the text you want to hyperlink before clicking the button. The prompt defaults to https:// so you only need to paste or type the rest of the URL. This convert word into html approach handles all the markup automatically behind the scenes.
Aligning Text with the Best Word to HTML Converter
The alignment buttons sit in the fourth group of the toolbar. Left alignment is the default for most content and wraps text in a paragraph or div with left-aligned styling. Center alignment centers the selected content. Right alignment pushes content to the right edge. These alignment options use the justifyLeft, justifyCenter, and justifyRight document commands respectively.
Alignment is useful for visual presentation. Center alignment works well for headings, short announcements, or callout text. Right alignment can be used for pull quotes, dates, or author credits. The convert word to clean html output preserves these alignment instructions in the generated code, though note that inline alignment may be stripped during the cleanup process depending on how the browser implements the command.
Loading Sample Content to Explore the Tool
The Load Sample button in the Rich Text Editor panel header inserts a pre-written document into the editor. This sample includes a main heading, subheadings, formatted text with bold and italic elements, bullet lists, and a hyperlink. It is designed to demonstrate all major formatting features in one go.
Using the sample is the fastest way to understand how the tool behaves. Click Load Sample, and the editor fills with content while the HTML panel populates with the corresponding code. You can then edit the sample text, change formatting, or delete sections to see how each modification affects the output. This hands-on approach helps new users grasp the word converter to html workflow without starting from a blank page.
How to Convert Word Into HTML with Automatic Conversion
The conversion happens automatically as you type or apply formatting. The tool captures the inner HTML of the editor, runs it through a cleanup routine that strips inline style attributes and class names, then formats the remaining tags with proper line breaks. The result is clean, semantic HTML without presentational markup.
The cleanup process removes anything inside style="..." and class="..." attributes but preserves all structural tags like headings, lists, links, and text formatting elements. This means the output is lightweight and easier to maintain compared to HTML generated by traditional word processors, which often produce bloated code. Every time you type or click a formatting button, this word to html convert engine refreshes the output panel instantly.
Understanding the Live Word and Character Counters
The editor footer displays two real-time statistics. The word count splits the editor text by whitespace and counts only non-empty segments, giving you an accurate word total. The character count measures the total length of the text including spaces. Both counters update on every keystroke or formatting change through the oninput event handler.
These counters help you meet content length requirements. If you are writing a meta description that needs to stay under 160 characters, or a blog post targeting a specific word count, these live stats remove the guesswork. The word converter html approach of showing both metrics side by side gives you complete awareness of your document dimensions while you write.
Copying and Downloading from the Best Word to HTML Converter
The HTML Output panel provides two export options. The Copy button copies the entire generated code to your clipboard with one click. The button briefly shows a check mark to confirm the action succeeded before reverting to its original label. The Download button creates a file named converted.html and triggers a browser download, saving the code directly to your computer.
Copy is ideal when you need to paste the HTML into a content management system, an email builder, or a code editor. Download is better when you want to save the file for later use or upload it to a web server. Both functions check that the output contains content before executing — if the output area is empty, nothing happens. This word file to html converter gives you flexible options for taking your code from the tool to production.
Clearing the Editor and Resetting Your Work
The Clear button in the toolbar empties the rich text editor completely. It sets the editor innerHTML to an empty string and triggers the conversion function, which resets the HTML output panel along with all counters. The word count shows 0 words, the character count shows 0 chars, and the output area shows the tag count as 0 tags.
Clearing is useful when you finish one document and need to start another. There is no confirmation prompt, so the action is immediate. If you clear accidentally and need to recover your content, the Load Sample button can repopulate the editor with the demo content as a starting point. This word converter html workflow makes it easy to reset and begin fresh without refreshing the entire page.
Tracking Output Size with Character and Tag Counters
The HTML Output panel footer shows two additional statistics specific to the generated code. The character counter displays the total length of the HTML string, useful for checking file size or code limits. The tag counter counts every HTML tag in the output by matching opening and closing angle brackets, giving you a quick sense of document complexity.
These output stats help you gauge the efficiency of your code. A high tag count relative to your word count may indicate unnecessary markup. The counters update automatically whenever the editor content changes, so you can experiment with different formatting approaches and instantly see how they affect the output size. Using this best word file to html converter effectively means monitoring both input and output metrics throughout your workflow.
Best Practices for Using This Tool Effectively
Start every session by planning your content structure. Use headings to create a clear outline before writing body text. Apply bold and italic formatting sparingly — too much emphasis defeats the purpose and makes content harder to read. When creating lists, keep items concise and parallel in structure. For links, use descriptive anchor text instead of generic phrases like "click here."
Check the HTML output regularly as you work to ensure the generated code matches your expectations. The cleanup system strips inline styles, so if your content depends on specific styling, you need to add it separately through an external stylesheet. Save your final output both as a downloaded file and as a backup copy in your clipboard. Following these practices ensures your online word to html converter sessions produce high-quality, production-ready code every time.
Frequently Asked Questions
No, the tool does not upload or parse Microsoft Word files. The name "Word to HTML Converter" describes the workflow — it provides a word-processor-like editing experience where you type and format content visually, and the tool generates clean HTML code from that formatted text. If you have an existing .docx file, you need to copy its content and paste it into the editor, then use the formatting toolbar to adjust the markup as needed.
The cleanup system strips style and class attributes intentionally to produce lightweight, portable HTML. Inline styles create maintenance problems because they override external stylesheets and bloat the code. By removing them, the tool ensures the output works consistently across different platforms, content management systems, and email clients. If you need specific styling, apply it through an external CSS file rather than inline attributes.
Yes, the clean HTML output works well as a starting point for email templates. Email clients prefer simple, inline-free HTML for consistent rendering. However, most email templates require table-based layouts and inline styles for cross-client compatibility, so you may need to add those after generating the base HTML. The tool handles the content structure and text formatting, leaving you to wrap the result in your email container framework.
The current toolbar does not include an image insertion button. To add images, you can paste HTML image tags directly into the editor if you are comfortable with code, or you can type your content leaving placeholders where images should go, then add the img tags manually in the HTML output panel. The tool focuses on text formatting and structure, so image handling requires a small amount of manual intervention.
The editor does not enforce any hard content limit. You can write as much as you need — the word counter and character counter keep you informed of your document size. The HTML output panel grows to accommodate the generated code, and the Copy and Download functions handle content of any length. Browser memory is the only practical constraint, and modern browsers handle very large documents without issues.
The contenteditable editor supports basic undo and redo through the standard browser keyboard shortcuts — Ctrl+Z for undo and Ctrl+Y or Ctrl+Shift+Z for redo. These work for typing, formatting changes, and most other editing actions. However, undo may not cover every action equally since browser implementations vary. If you make a mistake that undo cannot fix, the Clear button followed by Load Sample can reset your work to a known starting point.
The conversion runs synchronously on every keystroke through the oninput event handler. For typical document lengths, the operation completes in milliseconds and causes no noticeable lag. The cleanup routine uses simple string replacements — removing style and class attributes with regular expressions, then inserting line breaks between tags. This lightweight approach keeps performance smooth even with documents containing hundreds of lines of formatted content.
Special characters like ampersands, less-than signs, and quotation marks are handled by the browser innerHTML property during the initial capture. The contenteditable div produces HTML with proper entity encoding for most special characters. However, for comprehensive encoding of all special characters in URLs and attributes, you should run the output through a dedicated encoder before using it in production environments.